Thursday, December 24, 2009

Security Summit November 2009: ZFS Crypto

Security Summit November 2009: ZFS Crypto


Discussed was security in large system installations with speakers from CTO, technical leaders, customers and community members.

Kicking off the 4th session was a presentation on ZFS Crypto: Data encryption for local, NAS and SAN. The presentation slides are in PDF format.


ZFS Theme

The original overall theme behind the creation of ZFS had been "to create a reliable storage system from inherently unreliable components". This theme is now changing "to create a secured reliable storage system from inherently unreliable components". Universal encryption in conjunction with data integrity had traditionally been considered "too expensive"... the implementation of ZFS helps to demonstrate that this may not be the case any longer.

ZFS Data Integrity

All data in ZFS is written via Copy on Write algorithm, meaning old data is not overwritten, providing for guaranteed data integrity (as long as the underlying hardware does not "lie" when something says it was written.) No RAID write hole in ZFS and no journaling required.

End to end checksums are used for user data as well as meta-data which describes the user data layout, protecting data end-to-end - from disks on remote storage all the way to the host.

ZFS Commands

The ZFS command structure is centered around two basic commands:
  • zpool - controls storage pools
  • zfs - administer file systems, zvols, and dataset properties
ZFS Crypto Requirements

The requirements driving cryptography extensions to ZFS includes:
  • Retain Copy-on-Write semantics
  • Integrate into ZFS admin model
  • Backward compatibility to existing ZFS pools
  • NIST 800-57 Key management recommendations
  • Key management delegation to: users, virtualized, and multi-level security environments
  • Flexible software encryption policy
  • Separate key use vs key change
  • Support software only solution 
  • Support single disk laptop use cases
  • SPARC, Intel, and AMD hardware support
  • Support hardware crypto (OpenSPARC T2, Sun PCI-Express CA-6000 cards)
  • Local and Remote Key Management
ZFS Encryption Policy

The encryption policy is on the ZFS Data Set (looks like a file system) level.
  • Encryption policy set on creation time of the data set
  • AES-128, AES-192, or AES-256 available initially
  • Encryption sets are to be extensible
  • Encryption and Key Management policies are both inherited and delegatable
  • Encryption Key is randomly generated
  • ZFS checksum is forced to 256SHA for encrypted datasets
Key Management

The key management process is flexible
  • Wrapping keys can be done by user or admin via: passphrase, raw or hex key, or hardware like smart card
  • Weapping key is inherited by child datasets
  • Clones share original dataset key, but can have new keys
Key Change or ReKey

U.S. Government NIST 800-57 regulation require a key change every 2 years.
  • Wrapping Key change does not re-encrypt old data
  • Changes just Wrapping Key users/admins provide
  • New data encryption key from change time forward
  • New property "rekeyed" to show time of last change
  • Key Change or ReKey is an on-line operation
  • Internal "libzfs"  C API and scriptable "zfs" interface for external key management
Where's the decrypted data?

Data in DRAM memory (primary cache) is decrypted, data in SSD (secondary cache) or on disk is encrypted.
  • ZFS Intent Log is always encrypted 
  • ZFS ARC cache holds large amounts of decrypted data (/dev/kmem privileges required to see it)
  • Control of decrypted data in caches are controllable by dataset (or filesystem)
  • The "Primarycache" (DRAM) and "Secondarycache" (SSD) can be tuned to none, metadata, or all
Use Cases

Various "use cases" are listed in the presentation slides.

Friday, December 18, 2009

Itanium: The Death of Red Hat Linux Support

Itanium: The Death of Red Hat Linux Support

Announcement

As reported on The Register, Red Hat quietly announced RHEL 5 as the "end of the line" for Intel Itanium.

The History
The processor market as basically split between two comodity CISC (Completed Instruction Set Computing) chip makers, Intel (x86) and Motorola (68K) where high-end workstation & server vendors consolidated in Motorola (68K) with PC makers leveraging Intel (x86).


Motorola indicated an end to their 68K line was coming, x86 appeared to be running out of steam. A new concept called RISC (Reduced Instruction Set Computing) was appearing on the scenes. Wholesale migration from Motorola was on, many vendors creating their own very high performance chips based upon this architecture. Various RISC chips were born, created by vendors, adopted by manufacturers, each with their own operating system based upon various open standards.
  • SUN/Fujitsu/Ross/(various others) SPARC
  • IBM POWER
  • HP PA-RISC
  • DEC Alpha
  • MIPS MIPS (adopted by SGI, Tandem, and various others)
  • Motorola 88K (adopted by Data General, Northern Telecom, and various others)
  • Motorola/IBM PowerPC (adopted by Apple, IBM, Motorola, and various others)
There was reletively small volume shipments to most vendors of full fledge processors, although the computing prices allowed for continued investment to create increasingly smaller chips to enhance performance. Many of these architectures were cooperative efforts, with cross licensing, to increase volume, and create a viable vendor base. The move to 64 occurred in most of these high-end vendors. As the costs for investment continued to rise, in order to shrink the silicon chip dies, a massive consolidation started to occur, in order to save costs and continue to be profitable.

The desktop market continued to tick away with 32 bit computing at a lower cost, with 2 primary vendors: Intel and AMD.


A massive move to consolidate 64 bit RISC processors from the minority market shareholders from their smaller shares to a common, larger, Intel based 64 bit Itanium VLIW (Very Long Intruction Word) processors. This was a very risky move, since VLIW was a new architecture, and performance was unproven. The consideration by the vendors was Intel had deep enough pockets to fund a new processor. Some of the vendors, who consolidated their architectures into Itanium included:

  • HP - PA-RISC
  • DEC, purchased by Compaq, Purchased by HP - Alpha
  • DEC, purchased by Compaq, Purchased by HP - VAX
  • Tandem, purchased by Compaq, Purchased by HP - MIPS
  • SGI -> MIPS
Many of the RISC processors did not go away, they just moved to embedded environments, where many of the more complex features of the chips could continue to be dropped, so development would be less costly.
 
[Sun Microsystems UltraSPARC 2]

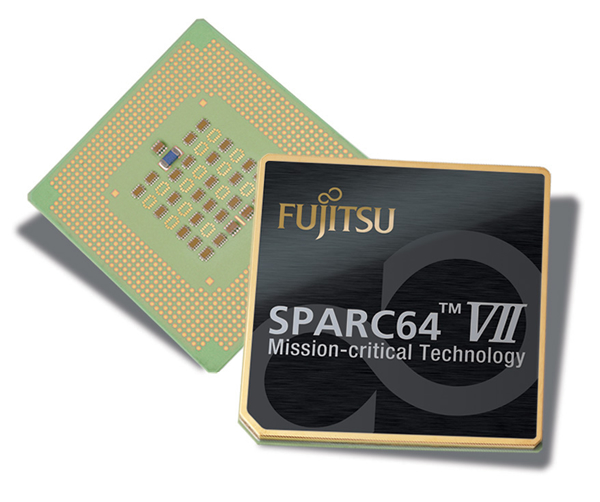
[Fujitsu SPARC64 VII]
[IBM Power]
Majority RISC architecture market share holds in the desktop & server arena seemed to consolidate during the fist decade of 2000 around RISC architectures of an open consortium driven by specifications called SPARC (predominately SUN and Fujitsu) and proprietary final proprietary single vendor drive POWER (predominately IBM)
 

[AMD Athlon FX 64 Bit]
AMD later released 64 bit extensions to the aging Intel x86 instructions (which all vendors, including Intel, had basically written off as a dead-end architecture) - creating what the market referred to as "x64". Intel was later forced into releasing a similar processor, competing internally with their Itanium. Much market focus started, consolidating servers onto this proprietary x64 based systems, sapping vitality and market share from RISC and VLIW vendors.

Network Management Implications

HP really drove the market to Itanium, after acquiring many companies. There was a large number of operating systems, which needed to be supported internally, so the move to consolidate those operating systems and reduce costs became important.

HP OpenView is one of those key suites of Network Management tools, which people don't get fired for purchasing. HP made announcements of their proprietary operating system HP-UX, Microsoft proprietary Windows, and open source Linux support for Intel Itanium. HP was never able to get OpenView traction with it under Linux under Itanium or Windows under Itanium, although they were able to provide support for their own proprietary HP-UX platform, as well as Linux under x86 architecture.

With Open Source Red Hat Linux going away on Itanium. Itanium as a 64 bit architecture is clearly taking a severe downturn in the viable 3rd party architectures, and Network Management from OpenView will obviously never become a player in a market that will no longer exist.
The IBM POWER architecture, even though it is one of the last two substantial RISC vendors left, has never really been a substantial vendor in Network Managment arena, even with IBM selling Tivoli Network Management suite. Network Management will most likely never be a substantial power under POWER.

"Mom & Pop" shops run various Network Management systems under Windows, but the number of managed nodes is typically vastly inferior to the larger Enterprise and Managed Services markets. The software just does not scale as well.

Sun SPARC Solaris (with massive vertical and horizontal scalibility) and Red Hat Linux x68 (typically limited to horizontal scalibility) are really the only two substantial multi-vendor Network Management platform players for large Managed Services installations left. Red Hat abandoning HP's Itanium Linux only continues to solidify this position.

Wednesday, December 16, 2009

Oracle - Sun Update

Oracle boss Larry Ellison

Oracle - Sun Update

The News

The New York Post reported today that the Oracle-Sun merger may be getting the approval of the European Commissioner.
Neelie Kroes approved the deal after Oracle agreed to fund the open database software, dubbed MySQL, for the next three years at more than $24 million annually.


At the same time, Oracle will form an advisory group of MySQL customers.
The Facts 

The facts in the Oracle acquisition of Sun (who formerly acquired MySQL) are pretty clear:
  • No company can control an kill an Open Source project: if there is a problem, the project will just fork using other available developers - so there was little reason for the European Commission to express concern over the acquisition using the basis of MySQL.
  • It does not take a genius to figure out that Sun invested $1 Billion US$ into MySQL and Oracle would need to fund MySQL from dying in order to make a return on that investment, when they purchase Sun. Oracle already funds InnoDB annually, so this is no surprise.
  • There is little confirmation that Oracle would be able to raise $1 Billion US$ by selling them off, since the true monetary value of the (free & open source) MySQL is with the assets & service that are sold around it (i.e. servers, support, integration, etc.) Of course, any other company willing to buy MySQL would come under the same EC scrutiny, deterring other buyers.
  • It also does not take a genius to figure out that MySQL is no competitor to Oracle, since Oracle already owns InnoDB, which is the main transactional heart of MySQL. The acquisition of MySQL by Oracle will allow for closer integration and higher transactional performance.
  • It only takes a primary school education (i.e. the ability to read) to understand that the vast majority of applications which use Oracle do not offer MySQL as an alternative.
The European Commission Position

In short, this seems like a reasonable way out, for the European Commission, of the position they placed themselves in, by making an attempt to stop a merger on baseless grounds and a misunderstanding of Open Source software.

While some people ignorant of Open Source Software felt uncomfortable with the acquisition, the facts in the case did not merit concern.

The EC found a way to save face - good for them!

The Network Management Position

This is very good news for the world of Network Management. Why is that?

Network Management, especially from a Managed Services perspective, is a very costly ordeal. When a Managed Services company wants to provide a view of their network from a Network Management tool to a customer, if a database is required (always required for large installations), then databases like Oracle require a Service Bureau License - which is very costly.

Many Open Source Network Management tools, in an attempt to scale to the sizes from commercial vendors, need an database. An Open Source database like MySQL, with tight ties to Enterprise Databases like Oracle, is a huge benefit to all.

Tuesday, December 8, 2009

Network Management: IBM "In The Cloud'


Network Management: IBM "InThe Cloud"

Abstract:
Server Management can normally be done with or more recently, without a piece of software deployed on the remotely managed server. The hardware and software performing the management is normally referred to as server management system while the software deployed on the managed servers are normally called "agents".
There are two two traditional options: (1) do it yourself by investing into the hardware, software, and human infrastructure or (2) outsource it with a good analyst interfacing back to the service provider and gague performance through metrics. IBM recently talked up an option based upon the second option.

Option 1: Do It Yourself
Much of the content of this site discusses what is required to "do it yourself". The nuts and bolts of hardware, software, performance, acceleration, software, etc. are all involved. There is a level of knowledge

Option 2: Outsource It
Traditionally, a service provider will provide monitoring by containing management hardware and software in a data center with secure connections to a customer's data center. Pricing is sometimes difficult to gauge when going into a request for proposal.

Virtualize It
Take the management station and stick it in the internet somewhere. Seems to be related to Option #2, since most outsourcers  already provide web interfaces into their management systems and reporting, but we have yet to see the specifics on it. Here is IBM's latest offer with Tivoli "in the cloud".

The web-based Tivoli Live supports monitoring of 25 to 500 nodes...

A "Touchless" option monitors devices and operating systems (Windows, Linux, AIX, Solaris, HP-UX) using an agent-less Tivoli Monitoring 6.2.1. That goes for $44 per month per node.


Meanwhile, An agent-based OS and application monitoring option uses IBM Tivoli 6.2.1 and IBM Composite Application Manager for Applications, costing $58 per month per node.


IBM charges $14 per month per service extra for historical trend analysis, plus performance and capability reporting.


The service also requires a rather steep one-time $6,500 setup fee per customer for "on-boarding costs." Service contracts are a minimum of 90 days and run from one to three years.
This looks like a fine example of the outsourcer outsourcing their infrastructure to provide a service to a customer.

Sunday, December 6, 2009

Solaris 10: Measuring Performance Historically

Solaris 10: Measuring Performance Historically

Abstract:
Computing systems have traditionally provided way to metric the health of the system. UNIX System V systems have depended upon "System Activity Reporting" or "sar" tool. The "sar" tools can be set up for automatic collection.

Reporting in Real Time:
The "sar" can be used, without scheduling, to pull data in near-real-time from the kernel by specifying an interval and an average time. One can poll the run queue statistics 5 times on 2 second intervals using "sar" with the "-q" option:
Ultra60/root# sar -q 2 5
SunOS Ultra60 5.10 Generic_141444-09 sun4u 12/06/2009
22:36:04 runq-sz %runocc swpq-sz %swpocc
22:36:06 . . 0.0 . . 0 . . . 0.0 . . . 0
22:36:08 . . 1.0 . . 50 .. . 0.0 . . . 0
22:36:10 . . 0.0 . . 0 . . . 0.0 . . . 0
22:36:12 . . 0.0 . . 0 . . . 0.0 . . . 0
22:36:14 . . 0.0 . . 0 . . . 0.0 . . . 0
Average. . . 1.0 . . 10 .. . 0.0 . . . 0
Scheduling:
Scheduling in Solaris is done using the "crontab" facility. The "cron" daemon wakes up on a regular basis and runs scheduled tasks for individual users. To see the scheduler running, it appears in the process table.
Ultra60/root# ps -elf | grep cron
0 S root 307 1 0 40 20 ? 693 ? 13:44:11 ? 0:00 /usr/sbin/cron
The task lists scheduled by users can be browsed.
Ultra2/root$ cd /var/spool/cron/crontabs
Ultra2/root$ ls -al *
-rw------- 1 root sys. 190 Sep 3 14:22 adm
-r-------- 1 root root 452 Sep 3 14:22 lp
-rw------- 1 root root 531 Dec 6 01:13 root
-rw------- 1 root sys. 308 Sep 3 14:22 sys
-r-------- 1 root sys. 404 Dec 5 06:26 uucp
Scheduling System Activity Reporting:
The "sar" is typically scheduled by the "sys" user. The default is to not run it, by commenting out sample entries.
Ultra2/root$ cd /var/spool/cron/crontabs
Ultra2/root$ cat sys
#ident "@(#)sys 1.5 92/07/14 SMI" /* SVr4.0 1.2 */
#
# The sys crontab should be used to do performance collection. See cron
# and performance manual pages for details on startup.
#
# 0 * * * 0-6 /usr/lib/sa/sa1
# 20,40 8-17 * * 1-5 /usr/lib/sa/sa1
# 5 18 * * 1-5 /usr/lib/sa/sa2 -s 8:00 -e 18:01 -i 1200 -A
The following "sys" "crontab" entry will schedule 15 minute collections of performance metrics.
00,15,30,45 * * * * /usr/lib/sa/sa1
Viewing Scheduling by User:
The correct way to list your scheduling information by user is to use the "cron" with "-l" option.
Ultra60/root# crontab -l sys
#ident "@(#)sys 1.5 92/07/14 SMI" /* SVr4.0 1.2 */
#
# The sys crontab should be used to do performance collection. See cron
# and performance manual pages for details on startup.
#
# 0 * * * 0-6 /usr/lib/sa/sa1
# 20,40 8-17 * * 1-5 /usr/lib/sa/sa1
# 5 18 * * 1-5 /usr/lib/sa/sa2 -s 8:00 -e 18:01 -i 1200 -A
#
00,15,30,45 * * * * /usr/lib/sa/sa1


Historic Data:
The historic data is held in a file system directory. They are stored by numeric day number for a total of one month.
Ultra60/root# cd /var/adm/sa
Ultra60/root# ls -al
total 67068
drwxrwxr-x 2 adm. sys. ....512 Dec 6 00:00 .
drwxrwxr-x 9 root sys. ....512 Dec 5 03:10 ..
-rw-r--r-- 1 sys. sys. 1290144 Dec 1 23:45 sa01
-rw-r--r-- 1 sys. sys. 1177344 Dec 2 23:45 sa02
-rw-r--r-- 1 sys. sys. 1177344 Dec 3 23:45 sa03
-rw-r--r-- 1 sys. sys. 1177344 Dec 4 23:45 sa04
-rw-r--r-- 1 sys. sys. 1177344 Dec 5 23:45 sa05
-rw-r--r-- 1 sys. sys. 1091496 Dec 6 22:00 sa06
-rw-r--r-- 1 root root ..12024 Nov 7 03:15 sa07
-rw-r--r-- 1 sys. sys. .429984 Nov 8 23:45 sa08
-rw-r--r-- 1 sys. sys. 1154304 Nov 9 23:45 sa09
-rw-r--r-- 1 sys. sys. 1154304 Nov 10 23:45 sa10
-rw-r--r-- 1 sys. sys. 1154304 Nov 11 23:45 sa11
-rw-r--r-- 1 sys. sys. 1154304 Nov 12 23:45 sa12
-rw-r--r-- 1 sys. sys. 1154304 Nov 13 23:45 sa13
-rw-r--r-- 1 sys. sys. 1154304 Nov 14 23:45 sa14
-rw-r--r-- 1 sys. sys. 1154304 Nov 15 23:45 sa15
-rw-r--r-- 1 sys. sys. 1154304 Nov 16 23:45 sa16
-rw-r--r-- 1 sys. sys. 1154304 Nov 17 23:45 sa17
-rw-r--r-- 1 sys. sys. 1154304 Nov 18 23:45 sa18
-rw-r--r-- 1 sys. sys. 1154304 Nov 19 23:45 sa19
-rw-r--r-- 1 sys. sys. 1154304 Nov 20 23:45 sa20
-rw-r--r-- 1 sys. sys. 1142280 Nov 21 23:45 sa21
-rw-r--r-- 1 sys. sys. 1173672 Nov 22 23:45 sa22
-rw-r--r-- 1 sys. sys. 1292544 Nov 23 23:45 sa23
-rw-r--r-- 1 sys. sys. 1292544 Nov 24 23:45 sa24
-rw-r--r-- 1 sys. sys. 1292544 Nov 25 23:45 sa25
-rw-r--r-- 1 sys. sys. 1292544 Nov 26 23:45 sa26
-rw-r--r-- 1 sys. sys. 1292544 Nov 27 23:45 sa27
-rw-r--r-- 1 sys. sys. 1292544 Nov 28 23:45 sa28
-rw-r--r-- 1 sys. sys. 1292544 Nov 29 23:45 sa29
-rw-r--r-- 1 sys. sys. 1292544 Nov 30 23:45 sa30
Reviewing Scheduled Data:
There are dozens of reports which can be viewed.

The historic CPU report can be seen with no option or "-u" with "sar", for the same day.
Ultra60/root# sar
SunOS Ultra60 5.10 Generic_141444-09 sun4u 12/06/2009
00:00:00 %usr %sys %wio %idle
00:15:01 0 2 0 98
00:30:00 0 2 0 98
00:45:00 0 2 0 98
01:00:00 0 2 0 98
01:15:00 0 2 0 98
...
21:15:00 0 1 0 99
21:30:01 0 1 0 99
21:45:00 0 1 0 99
22:00:00 0 1 0 99
Average 33 33 0 33
Historic memory usage can also be seen via "sar", using the "-r" flag.
Ultra60/root# sar -r
SunOS Ultra60 5.10 Generic_141444-09 sun4u 12/06/2009
00:00:00 freemem freeswap
00:15:01 163651 10451488
00:30:00 163651 10451488
00:45:00 163651 10451485
01:00:00 163651 10451485
01:15:00 163385 10443984
...
21:00:00 190656 19398416
21:15:00 190656 19398416
21:30:01 190656 19398415
21:45:00 190656 19398416
22:00:00 190656 19398416
Average. 177153 14924952

The "sar" command will also accept a file specifying a historic database, from a previous day in the month.
Ultra60/root# sar -k -f /var/adm/sa/sa02
SunOS Ultra60 5.10 Generic_141444-09 sun4u 12/02/2009
00:00:00 sml_mem. alloc. fail lg_mem... alloc fail ovsz_alloc fail
00:15:00 16646400 12855551 0 118005760 92904032 0 37765120 0
00:30:00 16646400 12858815 0 118005760 92904344 0 37765120 0
00:45:00 16646400 12855735 0 118013952 92900872 0 37765120 0
...
23:00:01 17096960 13002143 0 118767616 93431584 0 37765120 0
23:15:00 17096960 13004855 0 118767616 93433176 0 37765120 0
23:30:00 17096960 13011279 0 118775808 93434304 0 37765120 0
23:45:00 17096960 13005679 0 118775808 93428696 0 37765120 0
Average. 17031338 12977818 0 118666032 93366984 0 37765120 0
There are many other performance data sets which can be extracted once retained automatically from solaris, these are only starting examples.

Sun Ray Server Software 5 (4.2) Solaris Installation


SunRay Server Software 5 (4.2) Solaris Installation

Abstract:

SUN, whose stock ticker was called "SUNW" had traditionally been a desktop company. In 1982, SUN started marketing "W"orkstations, which were full fledged UNIX systems on the desktop, where those desktops ran everything from desktop applications to mail servers. Sun gradually become more server oriented during the 1990's with the expansion of the Internet, moving toward thin clients with the original SunRay1 in 1998. When Sun's computers were moving to UltraSPARC processors, their desktop solution was sensibly called "Ultra-Thin" clients (hence, the commands start with "ut" mnemonic) because very little processing was required on the desktop and most processing occurred on the server. A SPARC server can support multiple "Utra-Thin", or now called "Sun Ray" clients, using a simple modern Solaris OS in conjunction with SRSS 5 or Sun Ray Server Software.

Prerequisites:

This document describes the use of Sun Ray Services under SPARC Solaris. Ensure the following has been done:
  • The srss_4.2 software has been unzipped to /tmp
  • The 64 bit upgrade to the 32 bit version of jdk1.6 is installed.
  • Apache Tomcat has been un-gtar-ed into /opt
PreInstallation:

Verify the version of Java on the platform is sufficient and upgrade if not.
V100/root$ java -version
java version "1.5.0_20"
Java(TM) 2 Runtime Environment, Standard Edition (build 1.5.0_20-b02)
Java HotSpot(TM) Client VM (build 1.5.0_20-b02, mixed mode, sharing)

V100/root$
cd /usr/jdk
V100/root$
sh /var/spool/pkg/jdk-6u18-ea-bin-b04-solaris-sparc-28_oct_2009.sh
...
Do you agree to the above license terms? [yes or no]
yes
Unpacking...
Checksumming...
Extracting...
Archive:
...
Press Enter to continue.....
Done.

V100/root$
cd /usr/jdk
V100/root$
sh /var/spool/pkg/jdk-6u18-ea-bin-b04-solaris-sparcv9-28_oct_2009.sh
Do you agree to the above license terms? [yes or no]
yes
Unpacking...
Checksumming...
Extracting...
Archive:
...
Press Enter to continue.....
Done.

V100/root$
/usr/jdk/jdk1.6.0_18/bin/java -version
java version "1.6.0_18-ea"
Java(TM) SE Runtime Environment (build 1.6.0_18-ea-b04)
Java HotSpot(TM) Client VM (build 16.0-b11, mixed mode, sharing)
Unzip the Sun Ray Server Software in preparation for installation.
V100/root$ cd /tmp
V100/root$
ls -al srss_4.2_solaris.zip
-rw-r--r-- 1 root root 148595750 Jun 3 09:13 srss_4.2_solaris.zip
V100/root$
unzip srss_4.2_solaris.zip
creating...
...
inflating: srss_4.2/.install/admin_default
Add the appropriate services to the /etc/services file.
V100/root$ cd /tmp
V100/root$
ls -al srss_4.2_solaris.zip
-rw-r--r-- 1 root root 148595750 Jun 3 09:13 srss_4.2_solaris.zip
V100/root$
unzip srss_4.2_solaris.zip
creating...
...
inflating: srss_4.2/.install/admin_default
Decompress & burst the tomcat archive using GNU tar to help the administrator manage the Sun Ray Server Software via a GUI configuration tool.
V100/root$ cd /tmp/srss_4.2/Supplemental/Apache_Tomcat
V100/root$ gunzip apache-tomcat-5.5.20.tar.gz
V100/root$ cd /opt
V100/root$ /usr/sfw/bin/gtar -xf /var/spool/pkg/srss_4_2/Supplemental/Apache_Tomcat/apache-tomcat-5.5.20.tar
V100/root$ ln -s apache-tomcat-5.5.20 apache-tomcat
Installation:

Perform the Sun Ray Server Software installation.
V100/root$ cd /tmp/srss_4.2
V100/root$
./utinstall
Sun Microsystems, Inc. ("Sun")
SOFTWARE LICENSE AGREEMENT
...
Accept (Y/N):
Y
...
Installation of was successful.
# utinstall Version: 4.2 Thu Jun 3 10:51:17 EDT 2010
Sun Ray Server Software 4.2 not installed
Sun Ray Data Store 3.2 not installed
Do you want to install Sun Ray Server Software 4.2 French Admin GUI (Y/[N]): N
Do you want to install Sun Ray Server Software 4.2 Japanese Admin GUI (Y/[N]): N
Do you want to install Sun Ray Server Software 4.2 Simplified Chinese Admin GUI (Y/[N]): N
Kiosk Mode 4.2 not installed

Enter Java v1.6 (or later) location [/usr/java]: /usr/jdk/jdk1.6.0_18

About to carry out the following operations:
Install [ Sun Ray Server Software 4.2 ]
Install [ Sun Ray Data Store 3.2 ]
Install [ Sun Ray Server Software 4.2 ]
Install [ Kiosk Mode 4.2 ]
Install [ Kiosk Mode 4.2 localized files ]
Install [ data for utslaunch ]
Install [ Sun Ray Server Software 4.2 modules for utsunmc ]
Install [ Service Tags 1.1 ]

Continue? ([Y]/N): Y

Installing Sun Ray Server Software version 4.2 ...
...
+++ Done.
Post-Installation:

Prepare environment and Reboot server in order to enable the Sun Ray Server Software.
V100/root$ cat >>/etc/profile \
PATH=$PATH:/opt/SUNWut/sbin
MANPATH=$MANPATH:/opt/SUNWut/man
export PATH MANPATH
!
V100/root$ cd / ; sync ; sync ; init 6
Configuring a Shared LAN

Configuring SunRay Services on a shared LAN allow for Ultra-Thin clients to be used on a non-dedicated interconnect. This is helpful in a DHCP environment where the server hosting the Sun Ray Server Software is receiving its configuration through DHCP.

To enable shared LAN connections:
# utadm -L on

Restart server:
# utrestart
The Sun Ray terminals, configured to use DHCP by default, should automatically receive a prompt. The Sun Ray Ultra Thin terminals will locate the Sun Ray Server via multicast. If any terminals are not receiving a prompt, they can be reset via a CNTRL-A.

Configuring a Private Interconnect

A private interconnect is preferred to ensure that the Ultra Thin terminals are receiving the proper quality of service over the network. For systems with a large number of terminals, this (more complex) configuration is preferable.

If the server will have a dedicated interconnect, select a network such as "192.168.2.0/24", and a new physical port to serve DHCP such as "hme1".
# utadm -a hme1

Selected values for interface "hme1"

host address: 192.168.2.252
net mask: 255.255.255.0
net address: 192.168.2.0
host name: Ultra2-hme1
net name: SunRay-hme1
first unit address: 192.168.2.50
last unit address: 192.168.2.99
auth server list: 192.168.2.252
firmware server: 192.168.2.252
router: 192.168.2.252

DHCP running on HME1? (Y)
Configuring the Sunray Server GUI Admin Software
V100/root# utconfig
...
Continue ([y]/n)? y
Enter Sun Ray admin password:
Re-enter Sun Ray admin password:
Enter Apache Tomcat installation directory [/opt/apache-tomcat]:
Enter HTTP port number [1660]:
Enable secure connections? ([y]/n)?
Enter HTTPS port number [1661]:
Enter Tomcat process username [utwww]:
Enable remote server administration? (y/[n])? y
Configure Sun Ray Kiosk Mode? (y/[n])?
Configure this server for a failover group? (y/[n])?

About to configure the following software products:

Sun Ray Data Store 3.2
Hostname: V100
Sun Ray root entry: o=utdata
Sun Ray root name: utdata
Sun Ray utdata admin password: (not shown)
SRDS 'rootdn': cn=admin,o=utdata

Sun Ray Web Administration hosted at Apache Tomcat/5.5.20
Apache Tomcat installation directory: /opt/apache-tomcat
HTTP port number: 1660
HTTPS port number: 1661
Tomcat process username: utwww
Remote server administration: Enabled

Sun Ray Server Software 4.2
Failover group: no
Sun Ray Kiosk Mode: no

Continue ([y]/n)? y

Updating Sun Ray Data Store schema ...
Updating Sun Ray Data Store ACL's ...
Creating Sun Ray Data Store ...

Restarting Sun Ray Data Store ...
Starting Sun Ray Data Store daemon .Jun 3 13:52:54 V100 utdsd[3537]: utdsd starting

Thu Jun 3 13:52 : utdsd starting

Loading Sun Ray Data Store ...

Executing '/usr/bin/ldapadd -p 7012 -D cn=admin,o=utdata' ...
adding new entry o=utdata
adding new entry o=v1,o=utdata
adding new entry utname=V100,o=v1,o=utdata
adding new entry utname=desktops,utname=V100,o=v1,o=utdata
adding new entry utname=users,utname=V100,o=v1,o=utdata
adding new entry utname=logicalTokens,utname=V100,o=v1,o=utdata
adding new entry utname=rawTokens,utname=V100,o=v1,o=utdata
adding new entry utname=multihead,utname=V100,o=v1,o=utdata
adding new entry utname=container,utname=V100,o=v1,o=utdata
adding new entry utname=properties,utname=V100,o=v1,o=utdata
adding new entry cn=utadmin,utname=V100,o=v1,o=utdata
adding new entry utname=smartCards,utname=V100,o=v1,o=utdata
adding new entry utordername=probeorder,utname=smartCards,utname=V100,o=v1,o=utdata
adding new entry utname=policy,utname=V100,o=v1,o=utdata
adding new entry utname=resDefs,utname=V100,o=v1,o=utdata
adding new entry utname=prefs,utname=V100,o=v1,o=utdata
adding new entry utPrefType=resolution,utname=prefs,utname=V100,o=v1,o=utdata
adding new entry utPrefClass=advisory,utPrefType=resolution,utname=prefs,utname=V100,o=v1,o=utdata

Added 18 new LDAP entries.

Creating Sun Ray Server Software Configuration ...
Adding user account for 'utwww' (ut admin web server user) ...done
Starting Sun Ray Web Administration...
See /var/opt/SUNWut/log/utwebadmin.log for server logging information.

Unique "/etc/opt/SUNWut/gmSignature" has been generated.

Restarting Sun Ray Data Store ...
Stopping Sun Ray Data Store daemon
Jun 3 13:53:20 V100 utdsd[3537]: utdsd got shutdown signal
Sun Ray Data Store daemon stopped
Starting Sun Ray Data Store daemon .Jun 3 13:53:23 V100 utdsd[4144]: utdsd starting

Thu Jun 3 13:53 : utdsd starting
Adding user admin ...
User(s) added successfully!

***********************************************************
The current policy has been modified. You must restart the
authentication manager to activate the changes.
***********************************************************

Configuration of Sun Ray Server Software has completed. Please check
the log file, /var/adm/log/utconfig.2010_06_03_13:48:03.log, for errors.

SunRay Firmware Upgrade

To use a SunRay Ultra-Thin client on the WAN,
follow these instructions to update to WAN firmware on an individual sunray.

To upgrade the firmware on individual units to the most recent LAN firmware:
# utfwadm -A -f /opt/SUNWut/lib/firmware_gui -e {unit MAC address}
# utquery -d {unit IP address}
Troubleshooting X Windows Configuration

If odd X Windows issues are observed, there are some checks to ensure installed files weren't corrupted:
# diff /usr/dt/config/Xconfig /etc/dt/config/Xconfig
47d46

this is outside of the limits given in the installation guide and will require re-installation
# diff /usr/dt/config/Xservers /etc/dt/config/Xservers
111a112,114
the results for the Xservers test is within acceptable limits, re-installation is only necessary for Xconfig
shutting down all Sunray units
# /etc/init.d/utsvc stop

reinstalling Xconfig
# /bin/cp -p /usr/dt/config/Xconfig /etc/dt/config/Xconfig

reinitializing Sunray units
# /opt/SUNWut/sbin/utrestart -c
Other Steps

Test your access to the SunRay Administration GUI. Enable SDAC access, if the soft-client is planned to be used.
Access Sunray administration GUI
  • enable SDAC access
  • warm reboot server (through GUI)
Conclusion:

The process for installation of the Sun Ray Server Software is fairly simple, many of the steps are not needed if a DHCP server and command line administration are sufficient.

- - - - - - - - - - - - - - - - - - - - -

UPDATED - 2010-06-16

Added more detail to the installation instructions and abstract.

Saturday, December 5, 2009

Solaris 10: Patching

Solaris 10: Patching

Abstract:
When any vendor releases a piece of software, there is a schedule to keep. If a piece of software must be perfect before being released, it will never be released, because no one is perfect. After any software install, patching should be conducted. Patching on the local Solaris target machine with direct access to the internet is the most straight forward process and this document will describe this scenario.

Pre-Requisites:
The first step in this process is to ensure that Solaris 10 Operating System is installed, followed by the installation of any optional Solaris 10 Contributed Software.

Command Line or GUI Patching:
The patching under Solaris 10 can be conducted via the "smpatch" command or the Java X Windows GUI "updatemanager'.

CLI (Command Line Interface) Patching:
The patching can be done via the "smpatch" at the command line. If you have not registered the new installation for the Update Manager, the system will inform you of this requirement.
Ultra2/root$ smpatch analyze
Failure: Cannot connect to retrieve detectors.jar: This system is currently unregistered and is unable to retrieve patches from the Sun Update Connection. Please register your system using the Update Manager, /usr/bin/updatemanager or provide valid Sun Online Account(SOA) credentials.

X Windows GUI Registration:
The process for registering a system on the Update Manager can be done via a GUI.
Ultra2/root$ echo $DISPLAY
192.168.3.103:0.0

Ultra2/root$ updatemanager
Java Accessibility Bridge for GNOME loaded.
...
From the JAVA GUI, first time users will be prompted for a username and password.
User Name: {registered username}
Password: {registered password}
Number: {service plan number} OR [x] Continue without providing a service plan number
[x] I have read the agreement and accepted it
[Next]

[x] Enable Auto Registration
[x] Sun may contact me...
[Finish]

[Close]
If you have not formerly registered, you will need to register on-line, to get an ID, in order to get your patches.

X Windows GUI Patching

Once the Update Manager has finished the registration process of the server, either the X Windows GUI or Command Line Interface can be used to continue patching.

Since the Update Manager is already running, it makes sense to use the GUI to install the outstanding patches after an initial install.
Select the [Updates] tab
Select the double checkmark box [xx] to select all available patches
select [Install ### Patches] button in the lower left hand corner

The "Installing" popup box appears, providing an indication of the progress.

CLI Patching Continued

Patching can be conducted using the lighter weight "smpatch" command line. The "analyze" command will display all patches outstanding while the "update" command will query, download, and apply all the patches automatically.
Ultra60/root# smpatch analyze
125215-03 SunOS 5.10: wget patch

Ultra60/root# smpatch update
125215-03 has been validated.
Installing patches from /var/sadm/spool...
125215-03 has been applied.
Post-Install Instructions

Once the patching is completed, the X Windows GUI can be quit
File -> Quit
If patches were installed which requires the system to restart, the best commands to engage those patches are the "init" or "shutdown" commands - the "reboot" command will not engage those patches.
Ultra2/root$ cd / ; sync ; sync ; init 6
The "init" process will take some time to complete, but the system will come down and restart.